.png)


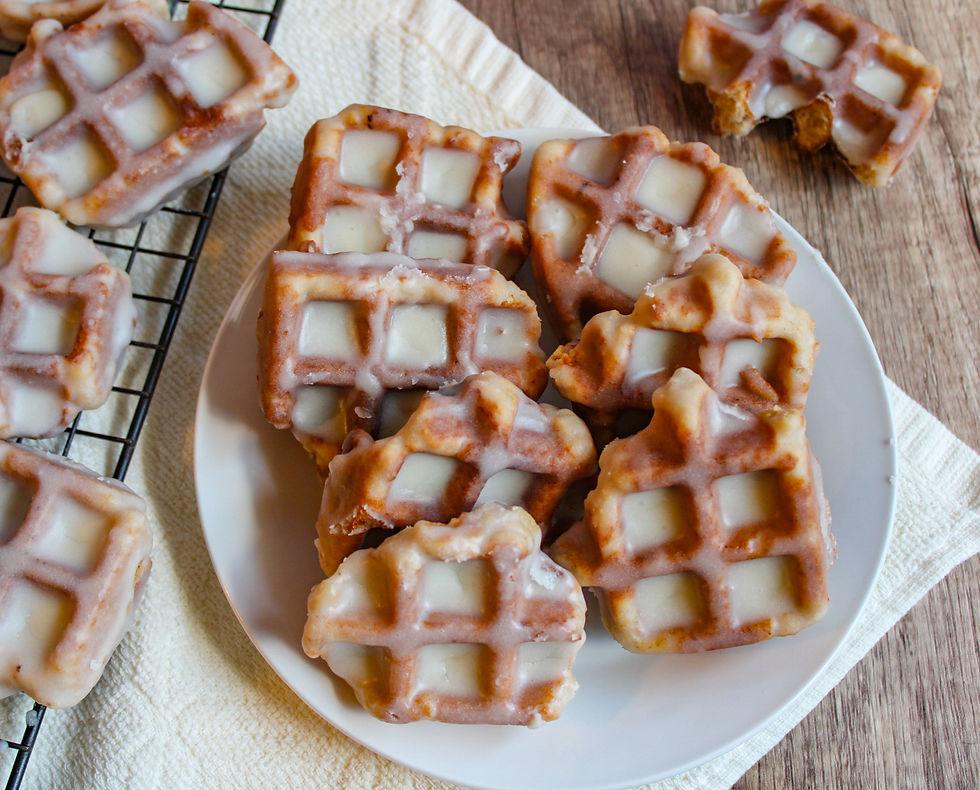
Maple Glazed Waffle Cookies
- Ashleigh Vaughn
- Jul 7
- 4 min read

Maple and cinnamon and brown sugar, oh my! These maple waffle cookies combine all of the classic comfort flavors into one delicious bite. Best of all, they’re baked up right in a waffle iron, making them a perfect choice if you’re on the hunt for a speedy treat.
What are Maple Glazed Waffle Cookies?
Glad you asked! These delicious little cookies are a favorite in our house. They are most requested during the Fall, but honestly they're great year-round. I call these cookies, but it really has a taste and texture that's more similar to a cake donut: a little crispy on the outside, but soft and chewy on the inside. And the maple glaze just really sets these cookies off. They're quick and easy to throw together and so delicious. You're probably going to want to make a double batch!

How to Make the Waffle Cookies
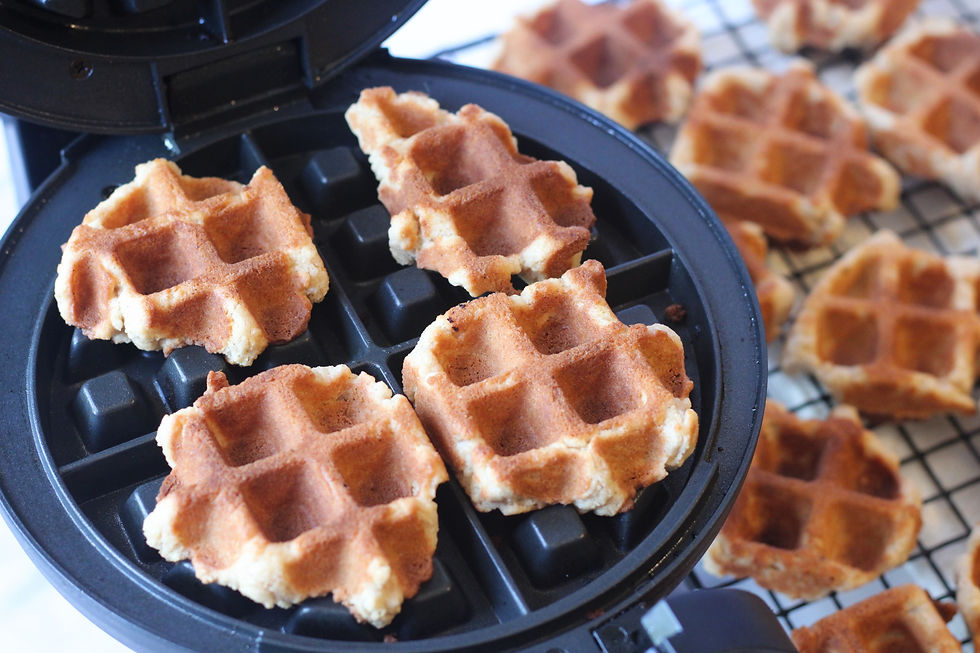
Start by heating up your waffle iron. The batter doesn't take long to mix up, and you want your iron piping hot. I used a single waffle iron and the baking process took me about 15 minutes. If you have a larger waffle iron you could get more cookies on the iron at once and definitely cut down on this time.
Stir together your dry ingredients: flour, salt, baking powder, cinnamon. Set it aside for later.
Next, cream together your softened butter and sugars until light and fluffy. Add in your eggs, oil, and vanilla and mix just until combined. Then add in your dry ingredients, mixing only until combined. Don't over-mix.
Once your waffle iron is warmed up, drop one heaping tablespoon of batter onto each section of your iron. (This may vary. You may need more/less dough depending on the size of your iron. The goal is to nearly fill up each section with dough.) I baked my cookies for approximately 2 - 2 1/2 minutes. Again, this may vary depending on your iron. Try checking the cookies at about 1 1/2 - 2 minutes. They should be browned, but not burnt, and should peel off the iron without sticking.
Place the cookies on a cooling rack and allow them to cool completely before adding the glaze.
How to Make the Maple Glaze
When I hear the word "glaze" I'm sadly taken back to all of the desserts I've ever eaten with these poor, little, thin, watery glazes drizzled over them. This is NOT that kind of glaze. This glaze is made with butter and heavy cream (no water here) so it's nice and thick and full-flavored. You can definitely omit the butter and substitute the cream for your preferred brand of milk. Just note that the glaze is likely to be much thinner and you may require less milk. I also prefer using maple extract because it lends a ton of flavor, without watering down glaze. Check out the substitutions listed below if you don't have maple extract on hand or prefer not to use it.
Start by melting the butter and warming the heaving cream. I usually just add them to a bowl together and melt in the microwave. Just be careful not to boil or burn your cream.
Next, add in your confectioner's sugar and maple extract and stir to combine. Keep stirring until it's smooth and clump-free. If the glaze is too thick to dip your cookies, try watering it down with a tiny bit of water or milk or more cream. I love a good thick glaze, but we want it to be thin enough to easily dip our cookies later on.

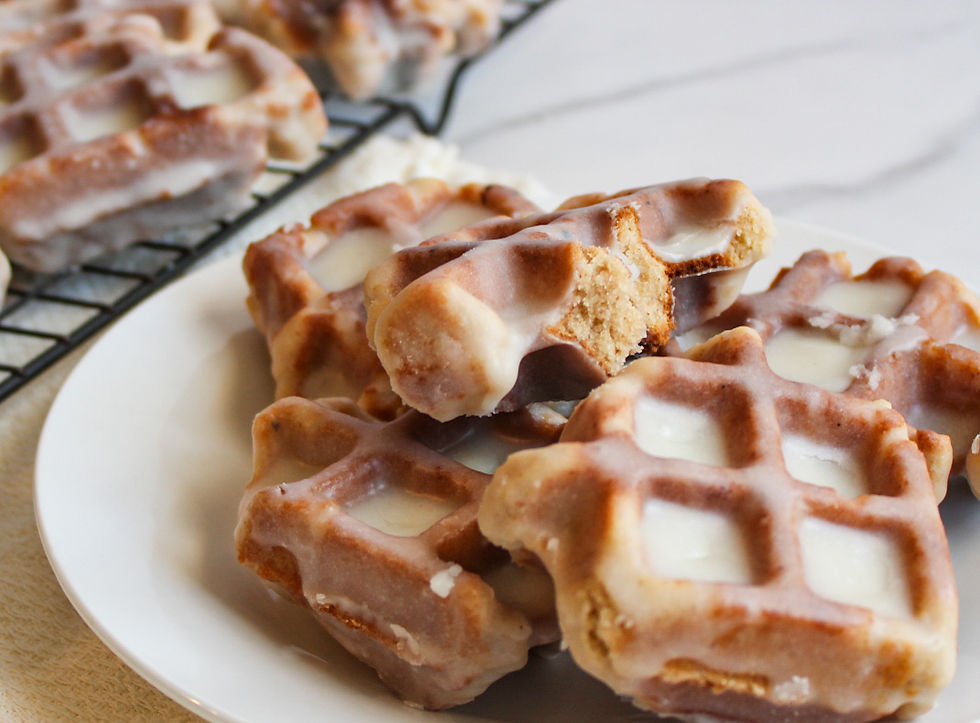
Dipping the Cookies
Using your fork, another utensil, or even your hand simply dunk the cooled cookies, one at a time, into glaze. Make sure both sides are coated thoroughly. Allow any excess glaze to drip back into the bowl, then place the cookies onto a cooling rack. I usually place the rack over a cookie sheet or parchment paper to catch any additional dripping. Allow the glaze a few minutes to set and your cookies are ready to serve!
Substitutions
Butter: I prefer unsalted, but if you only have salted on hand you can definitely use that.
Just leave out the additional salt when mixing your dry ingredients.
Cinnamon: Not a fan? Leave it out! These cookies are great either way. Or feel free to sub your favorite spice(s).
Heavy Cream: You can easily substitute whole milk and get a very similar texture. If you use a lower fat milk or dairy free alternative, it may yield a more watery glaze.
Maple Extract: If you don't have this on hand you have a couple of options. 1.You can simply leave it out or substitute another extract (vanilla is always a yummy choice). 2. You can substitute pure maple syrup. If using syrup, though, it can water down your glaze. So I recommend removing the heavy cream from the glaze recipe and subbing equal parts maple syrup instead.

Storage
These are best served immediately, but can be stored for 3-5 days at room temp. If storing, first allow the glaze to dry completely. Then place the cookies in an airtight container. These usually don't last very long at my house! So I've not yet attempted to freeze them, but if I were to do so, I'd use the same processes as for all my cookie recipes. Allow to cool completely, place inside and airtight container and into the freezer for up to 3 months. When ready to serve, allow to come to room temp inside the airtight container first.

Comments